Showing posts with label Pies and Tarts. Show all posts

Friday, 15 July 2016

流心芝士塔 ~ Molten Lava Cheese Tarts


食谱取自 : 雨之家

 
流心芝士塔

塔皮材料 :
110g 无盐奶油        
30g  幼糖                
180g 低筋面粉         
15g 全蛋液             

流心芝士馅材料 :
20g 鲜奶                       
50g 动物性鲜奶油      
150g 奶油芝士    ( 我用275g奶油芝士而已 )         
125g 马斯卡澎软芝士   
1茶匙 香草香精             
40g 幼糖                      
70g 原味优格             
10g 粟粉                      
1粒 蛋白                     

芝士表层涂料 :
1粒 蛋黃 ( 打散 )

 
塔皮做法 :
1. 将低筋面粉筛入大盆里, 加入切薄片或小丁的无盐奶油, 用手抓或搓至粉糠状。

2. 加入幼糖稍微混匀, 再倒入全蛋液, 搓至成软团。

3. 把软团分成30克左右的小团, 搓圆放入塔模内, 用拇指由中间往外慢慢推开至模顶, 稍微按压边沿做修整。

4. 接着在塔皮底部刺小孔后, 送入预热的烤箱, 以摄氏180度, 中层, 上下火, 烘烤20分钟。

5. 塔皮出炉后, 立即脱模待凉备用。


流心芝士馅做法 :
1. 事先烧一锅热水熄火, 然后将鲜奶, 动物性鲜奶油, 奶油芝士, 马斯卡澎软芝士, 香草香精和幼糖一起放进小锅里, 隔热水搅拌至幼滑。

2. 接着依序加入原味优格和粟粉搅匀。

3. 再加入蛋白, 开小火继续搅拌至出现微许的纹路即可。

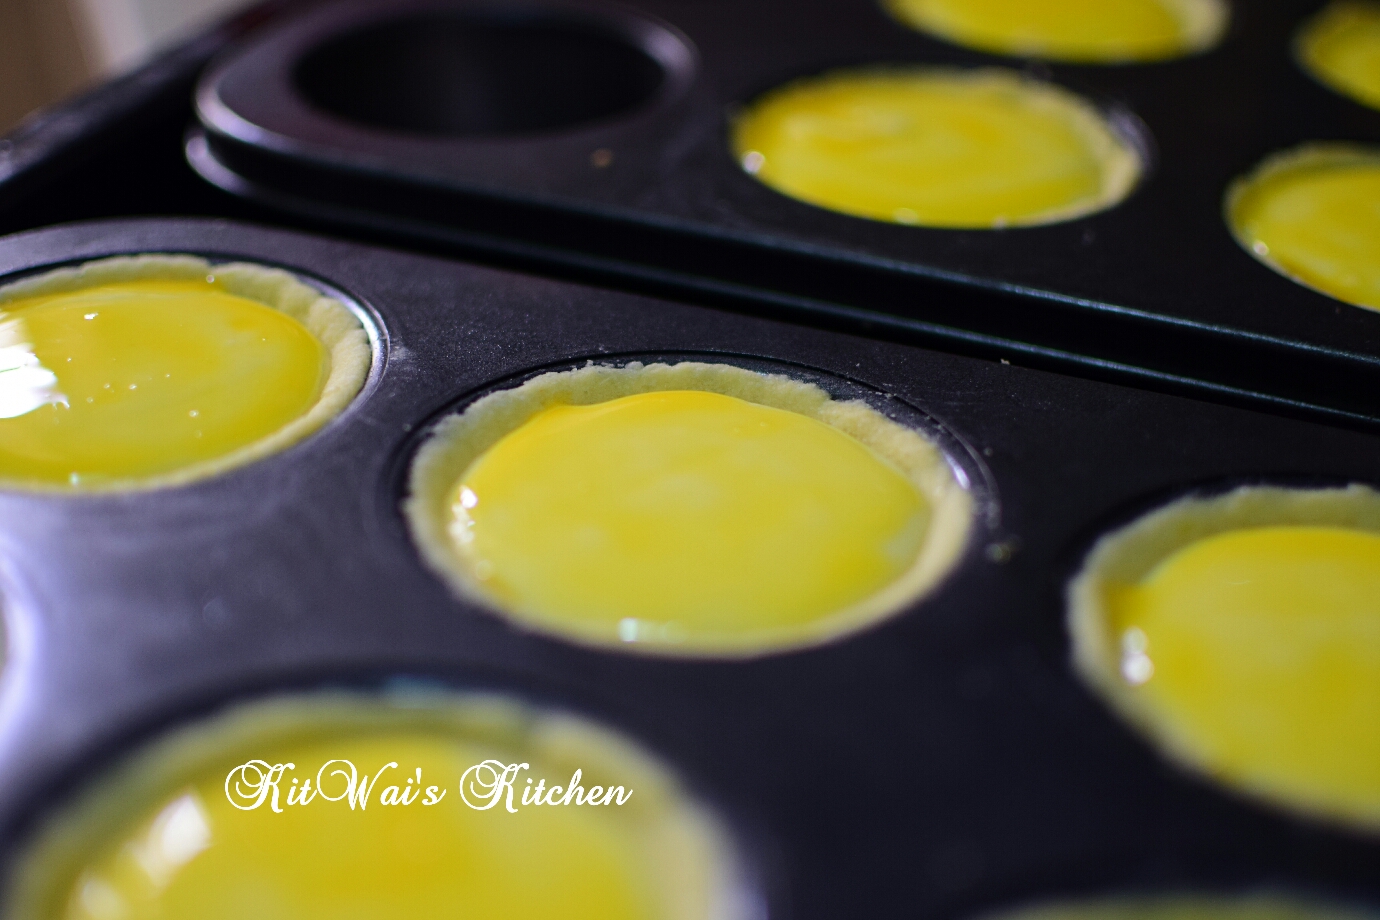
4. 把煮好的芝士馅装入挤花袋里, 在前端剪个小洞, 然后挤在塔皮内至满。把芝士塔表面的小气泡戳破, 放进冰箱冷藏约2小时以定型。

5. 取出冷藏过后的芝士塔, 先在塔皮边沿刷上清水, 再将蛋黄液涂抹在芝士馅表面, 一共涂抹两次。

6. 送入预热的烤箱, 以摄氏220度, 中上层, 上火, 烘烤10-12分钟。

7. 取出立即脱模, 趁热切半, 流心芝士即形成。冷热享用皆可哦。


♡♡♡ 温馨提示 ♡♡♡

~ 塔皮切忌搓揉过度, 避免起筋。

~ 烤好的塔皮得立即脱模, 以免底部产生湿气。

~ 在烤好的塔皮边沿刷上清水, 可避免二次烘烤时过于焦黑。

~ 蛋黄液涂抹两次, 色泽会更加好看。

~  芝士塔趁热切开才会有流液的状态, 冷却后就比较凝固了, 所以要看到流心, 就得留意这点哦。


Recipe source : siongyiiwong

Molten Lava Cheese Tart

For the pastry :
110g unsalted butter
30g caster sugar
180g all purpose flour
15g beaten egg

For the filling :
20g fresh milk
50g dairy whipping cream
150g cream cheese  ( I used 275g cream cheese and omit mascarpone cheese )
125g mascarpone cheese
1tsp vanilla essence
40g caster sugar
70g original flavor yogurt
10g corn flour
1 egg white

Egg yolk wash for brushing :
1 egg yolk ( lightly beaten )


To make the pastry :
1. In a large mixing bowl add in flour and cold butter . Use your finger tips to rub butter into the flour mixture, until it resembles coarse bread crumbs.

2. Add in caster sugar and beaten egg , mix until form a dough .

3. Divide the dough into 30g small dough ( mine was 34g ) . Transfer the small dough into the tart mould and gently press it to fit , starting from bottom up to the side . Cut out excess pastry .

4. Prick the base with a fork . Bake the pastry shells at 180°C for 20 minutes .

5. Remove from oven and place on wire rack to cool slightly . Remove pastry from the mould and transfer them onto a wire rack to cool completely .

 
To make the filling :
1. Combine fresh milk , dairy whipping cream , cream cheese , mascarpone cheese , vanilla essence and caster sugar in a heat proof bowl and place the bowl on a large cooking pot filled with simmering water . Use a hand whisk to stir until mixture is melted and smooth .

2. Then add in corn flour and yogurt .

3. Whisk egg white into cream cheese mixture . Keep whisking and cook at low heat until mixture is thicken with a glossy and luscious consistency .

4. Spoon the fillings into the tart shells . Put it into the fridge for 2 hours and let it set.

5. Take out from fridge , brush some water at the sides of the baked pastry . Brush the top filling with egg yolk wash .

6. Bake in the preheated oven at 220°C for 10 ~ 12 minutes .

7. Remove from oven and place on a wire rack to cool slightly . Remove from moulds and serve hot .


Thursday, 18 September 2014

椰子塔 ~ Traditional Coconut Tarts


我。。。很久没吃椰子塔了。你呢?

食谱取自 :Guai Shu Shu

椰子塔

塔皮材料:
25g 鸡蛋 ( 打散 )
100g 普通面粉 ( 过筛 )
20g 糖粉  ( 过筛 )
50g 牛油 ( 切块状 )
1 茶匙 香草香精

椰丝馅材料 :
200g 嫩白椰丝
75g 融化牛油
100g 细幼糖
2粒 鸡蛋
1 汤匙 练奶
3 汤匙 水

做法 :
1.塔皮 : 在大碗里,加入块状牛油和面粉。搓成饼碎状,然后加入糖粉。

2.加蛋液和香草香精,搓成团。 (图1)                 
~ 图1 / picture 1 ~

3.把(2)的面团放入冰箱里冷藏 20 ~ 30分钟 。 ( 如果面团容易操作,可不必放入冰箱里)
4.将塔皮從冰箱拿出。分成6等份,把小份面团压入塔模,慢慢由中心往外推開 , 再將多余的塔皮刮除。

5.底部叉洞,防止烤时涨起。备用。

6.椰丝馅 : 将全部椰丝馅材料放入大碗里,搅拌均匀.(图2)                
~ 图2/ picture 2 ~

7.预热烤箱180度 .将馅料倒入塔内,烤约20 ~ 25分鐘 (每台烤箱,上下溫度不同,请自己注意) 。 (图3)
~ 图3/ picture 3 ~

 
Recipe source :  Guai Shu Shu

Traditional Coconut Tarts

Ingredients  ( for tart shells ) :
25g egg (lightly beaten)
100g plain flour (sifted )
20g icing sugar (sifted )
50g chilled butter cut into cubes
1tsp vanilla essence

Coconut filling :
200g shredded coconuts
75g butter (melted)
100g castor sugar
2 eggs 
1 tbsp condensed milk
3 tbsp water

Method :
1. For tart shells : In a big mixing bowl , put butter cubes and sifted plain flour together. Use the finger tips to rub the butter cubes and flours together until it become crumby. Add in sifted icing sugars and continue to rub until well mix.

2. Add lightly beaten eggs and vanilla essence, mix slowly until it become a dough.  ( Picture 1 )

3. Put it in the fridge to chill for 20-30 minutes. Note that if you are able to handle soft dough , you can by pass this step.

4. Take the dough from the fridge .Divide it into 6 small dough .Use your hand to press the dough against the sides and make it as even as possible. Use a knife or anything sharp to cut off the sides.

5.Use a fork to make some holes to let any trapped air to escape. Set aside for later use.

6. For coconut fillings : In a big mixing bowl , mix all ingredients using a spoon or spatula until well mixed .  ( Picture 2 )

7. Pre-heat the oven to 180 degree Celsius. Scope the fillings into the tarts and bake in the oven’s lower shelf. Bake for 20 – 25 minutes or until the tart shells become golden brown .  ( Picture 3 )


Wednesday, 16 April 2014

香橙巧克力派 ~ Orange & Chocolate Pie


食谱取自 :  BBC GoodFood , Asian Edition @ April 2014

香橙巧克力派

材料
派皮 :
120g 普通面粉
40g 可可粉
35g 细砂糖
1/4茶匙 盐
80g 冷的无盐奶油 (切粒 )
1 粒 A 蛋
1 汤匙 淡奶油


香橙酱馅料:
6 粒中型橙 / 250ml 橙汁 ( 取汁和橙皮屑 )
200ml 动物性鲜奶油
4 粒蛋 ( 打散 )
85g 细砂糖

巧克力淋酱 :
85g  黑巧克力
100ml  动物性鲜奶油
2 汤匙  金糖漿


8” / 9”派盘


做法 :
~ 请参考柠檬蛋白派的做法 ~


香橙酱做法 :
1.锅内放入橙汁,动物性鲜奶油和橙皮屑,以中火加热至滚。熄火 。 (图1 )
                 

~ 图1 / picture 1 ~

2.在另一个碗里,将鸡蛋打散加入细砂糖,搅拌均匀。(图1 )
 
3.将(1)倒入蛋液里。以不停搅动的方式和中火煮到浓稠状(大概5分钟)。熄火(图1 )
4.倒入烤好的派皮里,待冷后放入冰箱冷藏至少4小时或至凝固。

 
巧克力淋酱做法 :
1.将巧克力碎放进一个干净无水无油的容器中隔水融化,然后加入动物性鲜奶油和金糖浆。搅拌均匀 。

2.取出派在盘子中然后用汤匙淋上巧克力酱即可。


Recipe source :  BBC GoodFood , Asian Edition @ April 2014

Orange & Chocolate Tart

Ingredients
For sweet pastry :
120g all-purpose flour
40g cocoa powder
35g caster sugar
1/4tsp salt
80g unsalted butter ( cold , cut in cubes )
1 large egg
1 tbsp heavy cream

For the orange filling :
6 medium ornages  / 250ml orange juice ( zest and juice kept separate )
200ml heavy cream
4 eggs  ( beaten )
85g caster sugar


For the chocolate drizzle / sauce :
85g dark chocolate
100ml heavy cream
2 tbsp golden syrup


8” / 9” pie pan

 
Method :
~ Please refer here for pastry method ~


To make filling :
1. In a saucepan , add in orange juice ,heavy cream and orange zest . Bring to boil . Turn off heat . ( Pidture 1)

2. Whisk the eggs and sugar in a bowl , then gradually whisk the hot cream into the mix . ( PIcture 1 )

3. Return the custard to it and cook for about  5 mins on a medium heat , whisking until it’s thick enough to coat the back of a spoon .  ( Pcture 1 )

4. Pour into the pastry case . Cool , then chill for at least 4 hours or ideally overnight until set .

 
For topping / chocolate sauce :
1. Melt chocolate using double boil method . Add in heavy cream and golden syrup . Mix well .

2. Spoon some over the pie , then return the pie to the fridge .


I'm linking this post to Little Thumbs Up event April 2014 , organised by Zoe of Bake for Happy Kids  and  Doreen of My Favourite Little DIY , hosted by Ann of Anncoo Journal .
                                           

 And this post also linked to Cook-Your-Books #11 ,hosted by Joyce from Kitchen Flavours .